Integration
Connecting InstantFeedback with HubSpot
We’ve designed the process of connecting InstantFeedback to your HubSpot account to be as simple and straightforward as possible.
Step 1: Create a New Campaign.
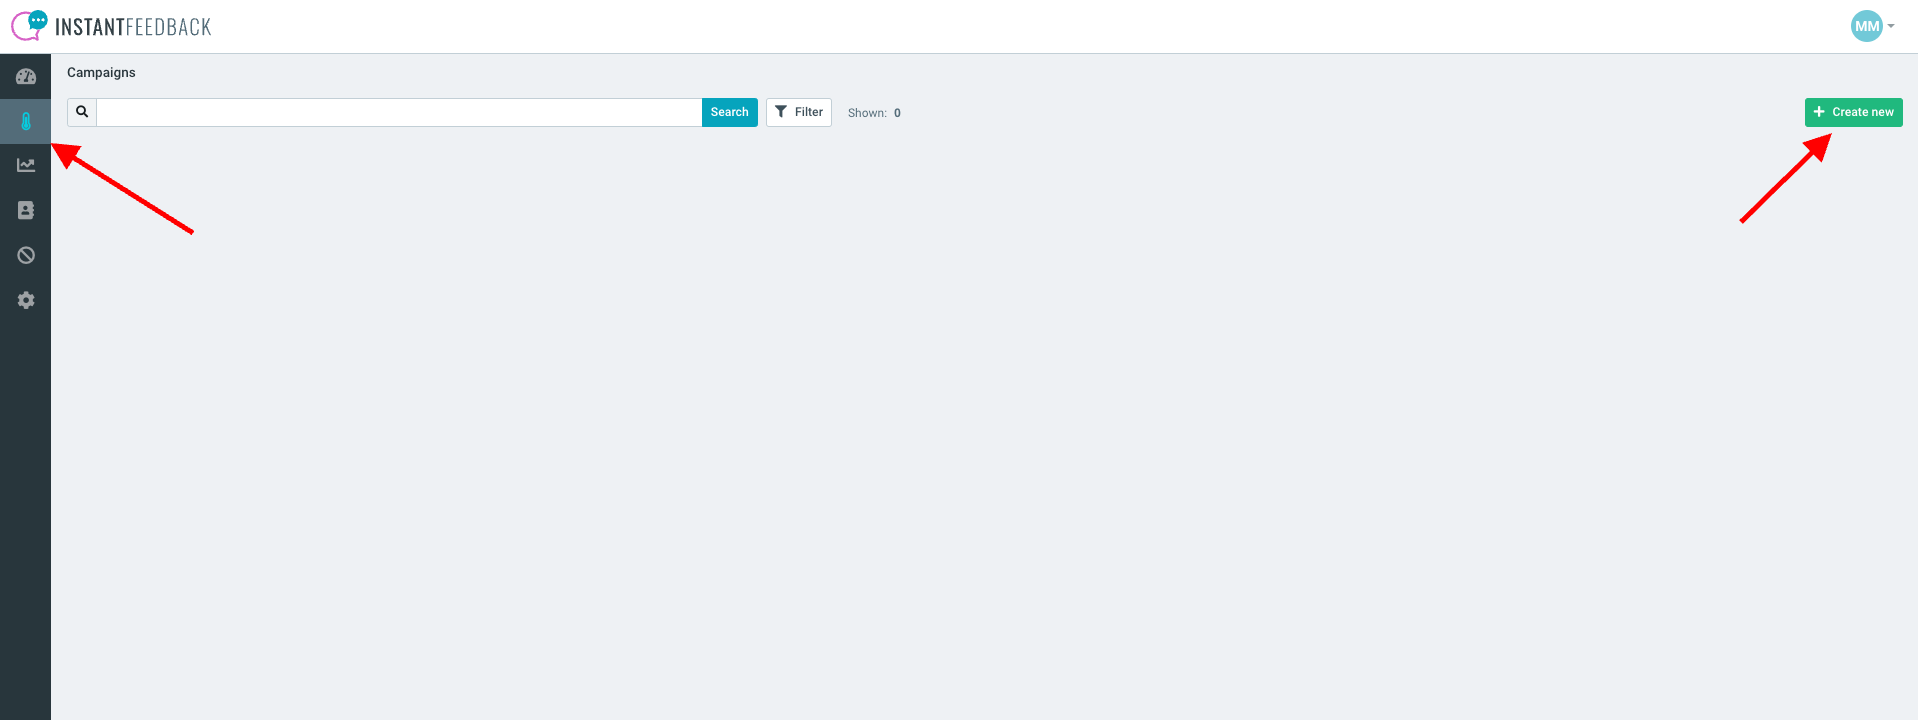
Navigate to Campaigns in the left-side menu.
Click Create New in the top-right corner.
Select Survey Type and Channel
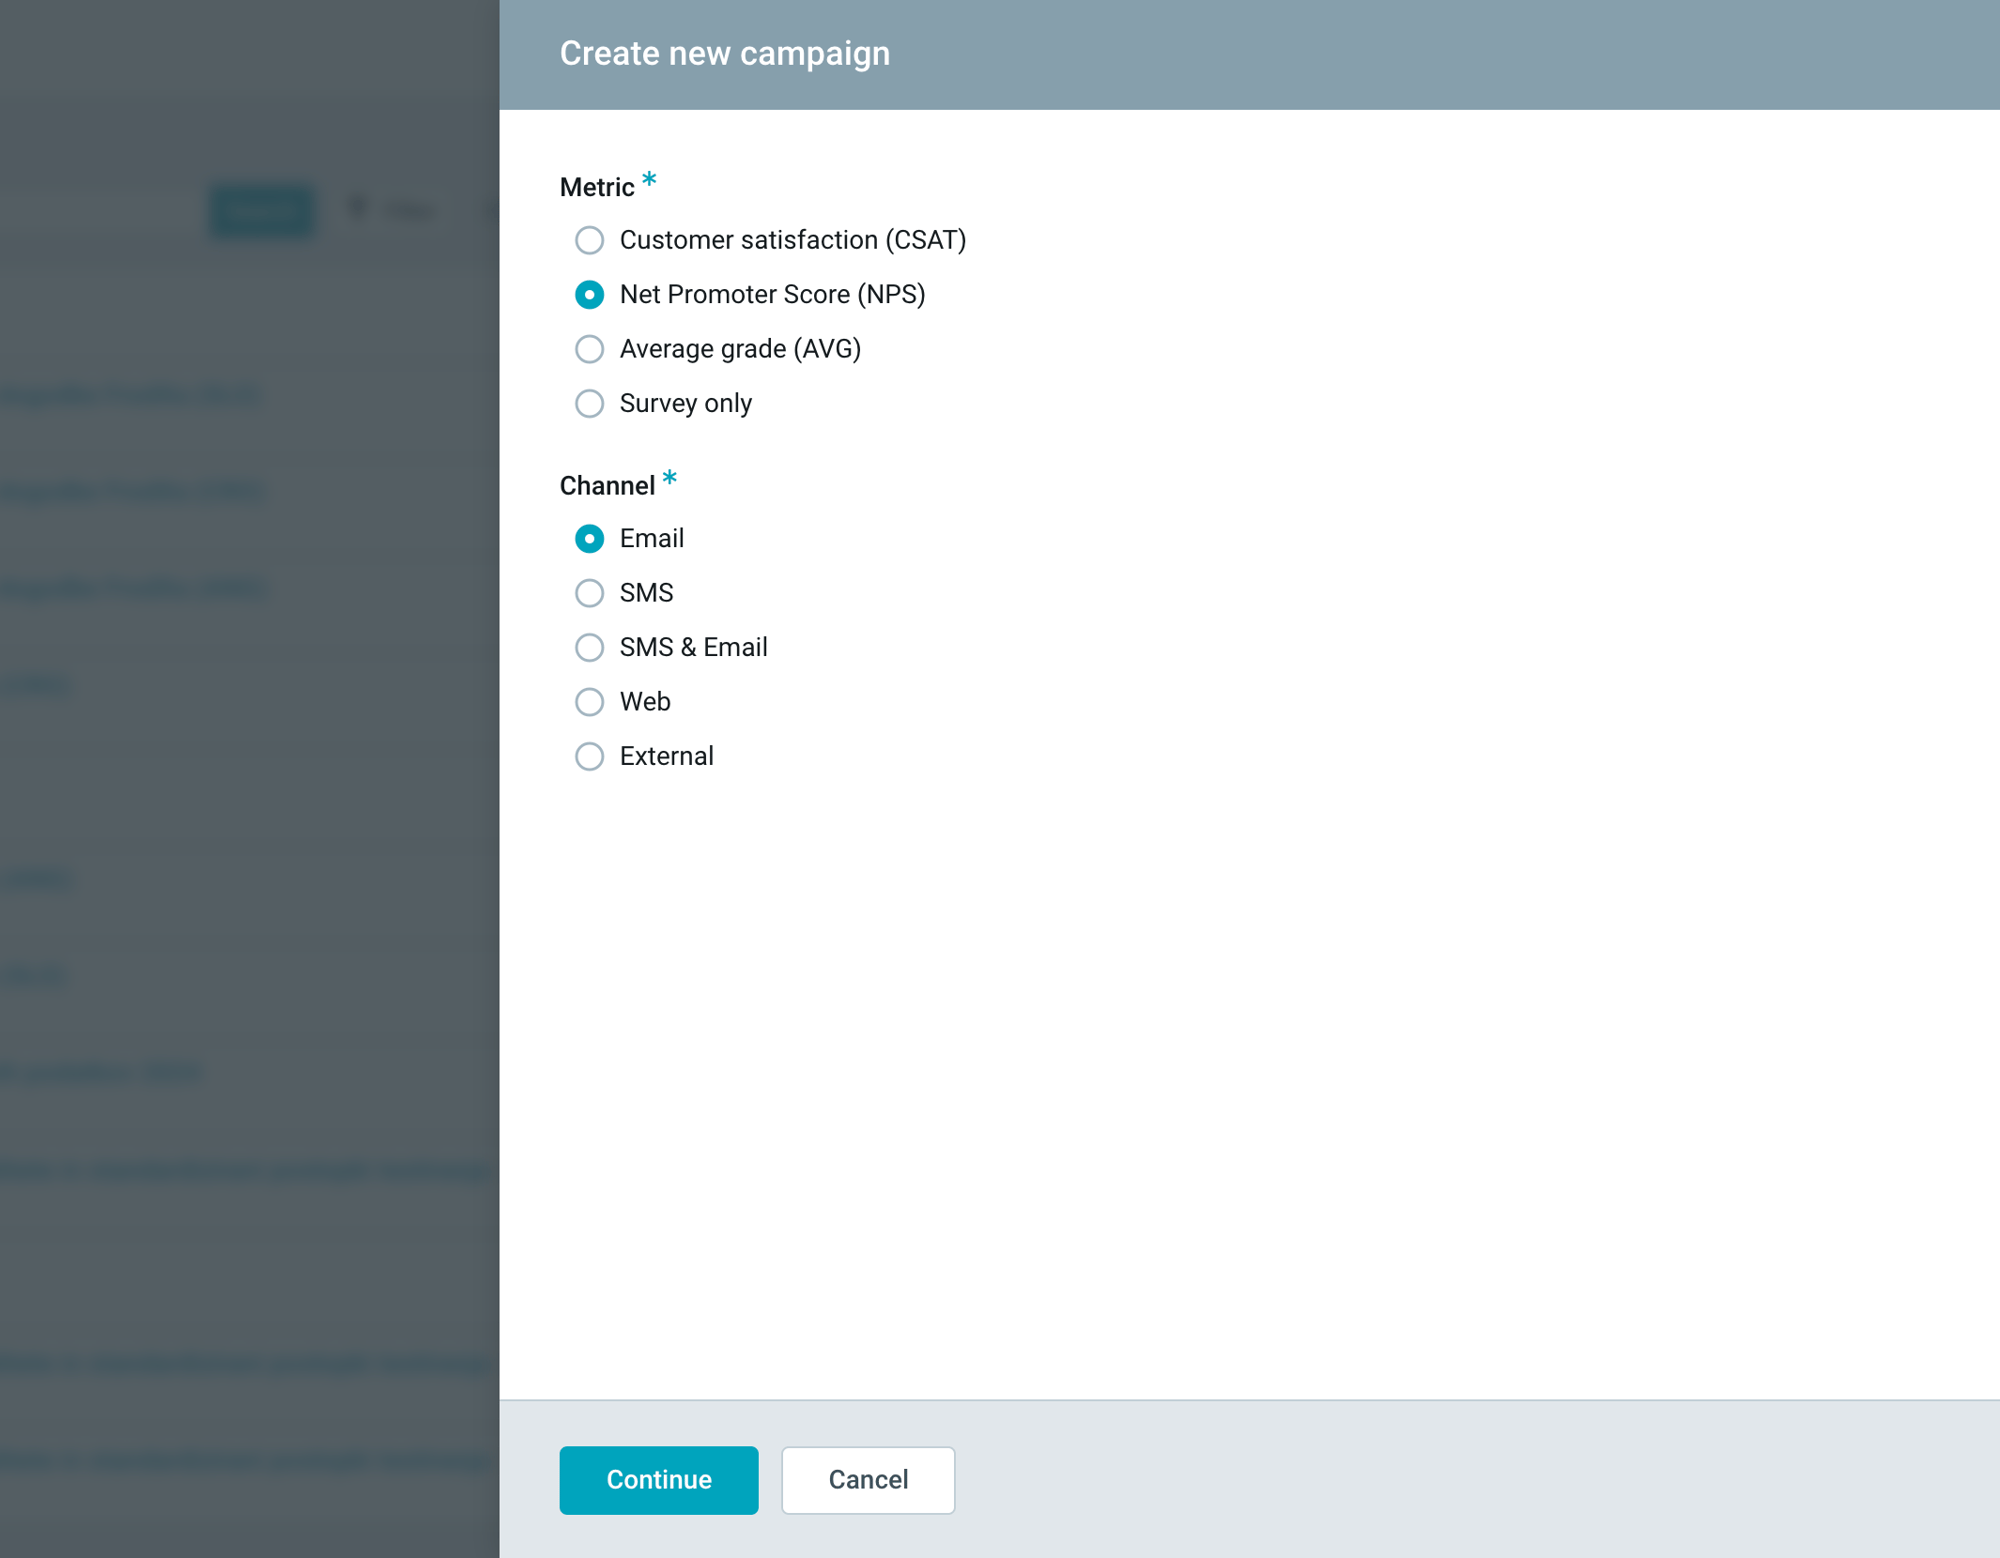
In the pop-up window, NPS (survey type) and Email (channel) are pre-selected. Unlock more powerful survey types with our higher-tier plans—discover how they can enhance your feedback strategy [here].
Step 2: Set Up the Campaign
1. General Settings
- Campaign Name: Choose an internal name for easy identification.
- Language: Set the language for the campaign.
- Scale: Keep as NPS.
2. Email Settings
Sender Information: Enter the sender's name and last name in this format: Brian Whatnot – no email required.

Custom Fields
Custom fields (e.g., hubspot_contact_id, hubspot_object, etc.) are automatically pre-set if your HubSpot account is connected.
Use these fields to personalize your campaign based on contact or object details in HubSpot.
These keys represent standard fields or identifiers commonly used in HubSpot for managing and referencing objects, users, and related data.

Optional: Add New Custom Field
If you want to include First name in your email, then you need to add a new Custom Field.
You can do that by clicking on Add custom field in the right corner of the screen.
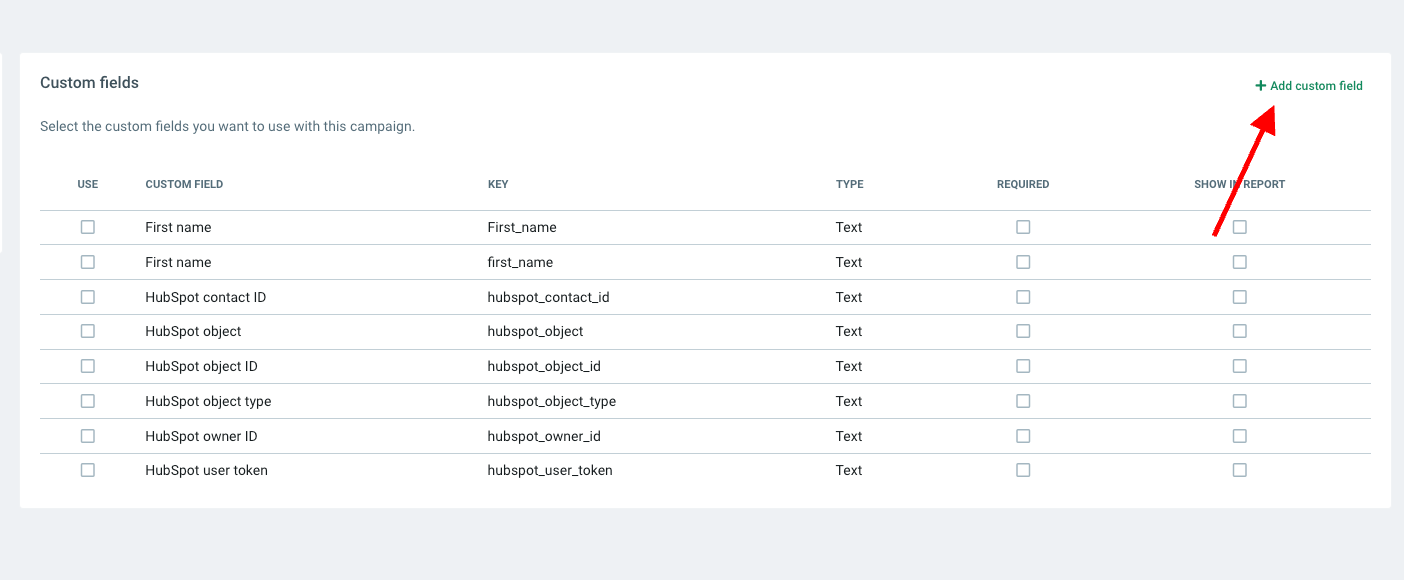
Example: Include {first_name} in your email by setting a custom field.

Step 3: Configure Text
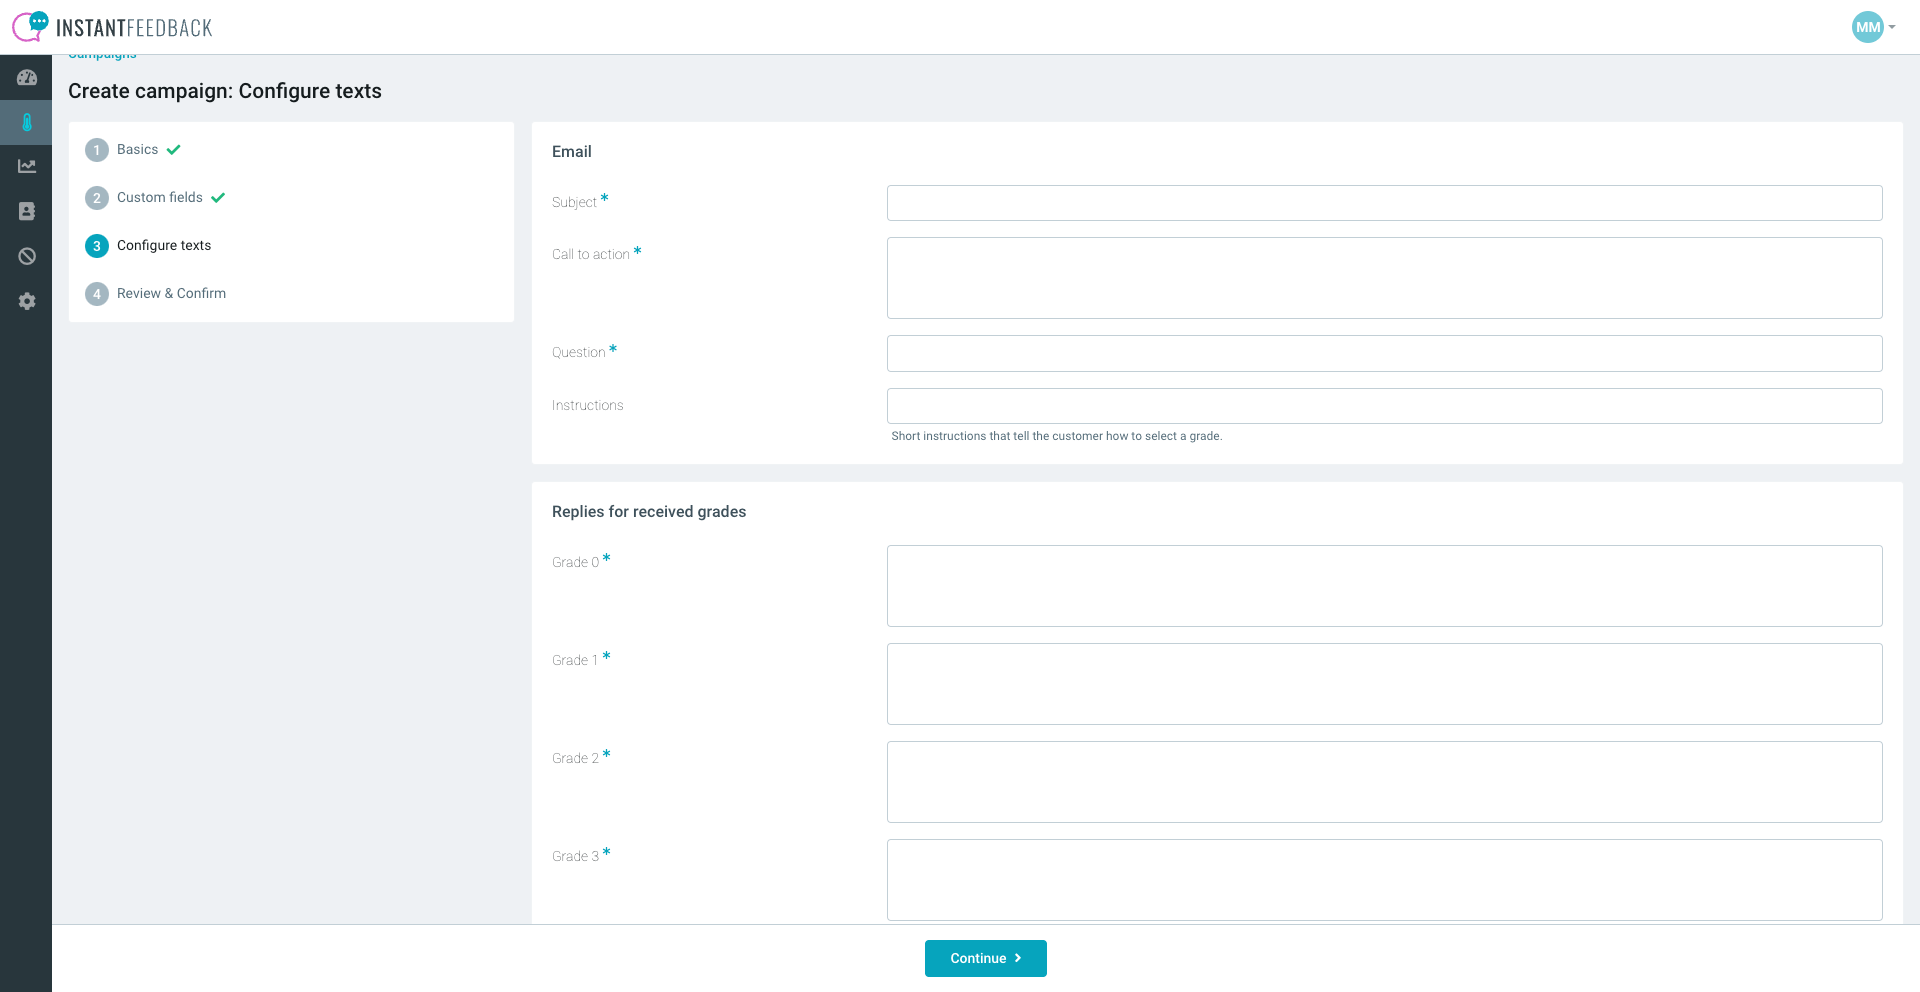
Customize your email content, including the subject, call to action, and survey question. We have prepared template texts to help you get started with different campaigns.
Step 4: Review and Confirm
- Review all campaign details and settings.
- Add optional features:
- Unsubscribe Box: Allow recipients to opt out.
- Email Appearance: Customize with CSS.
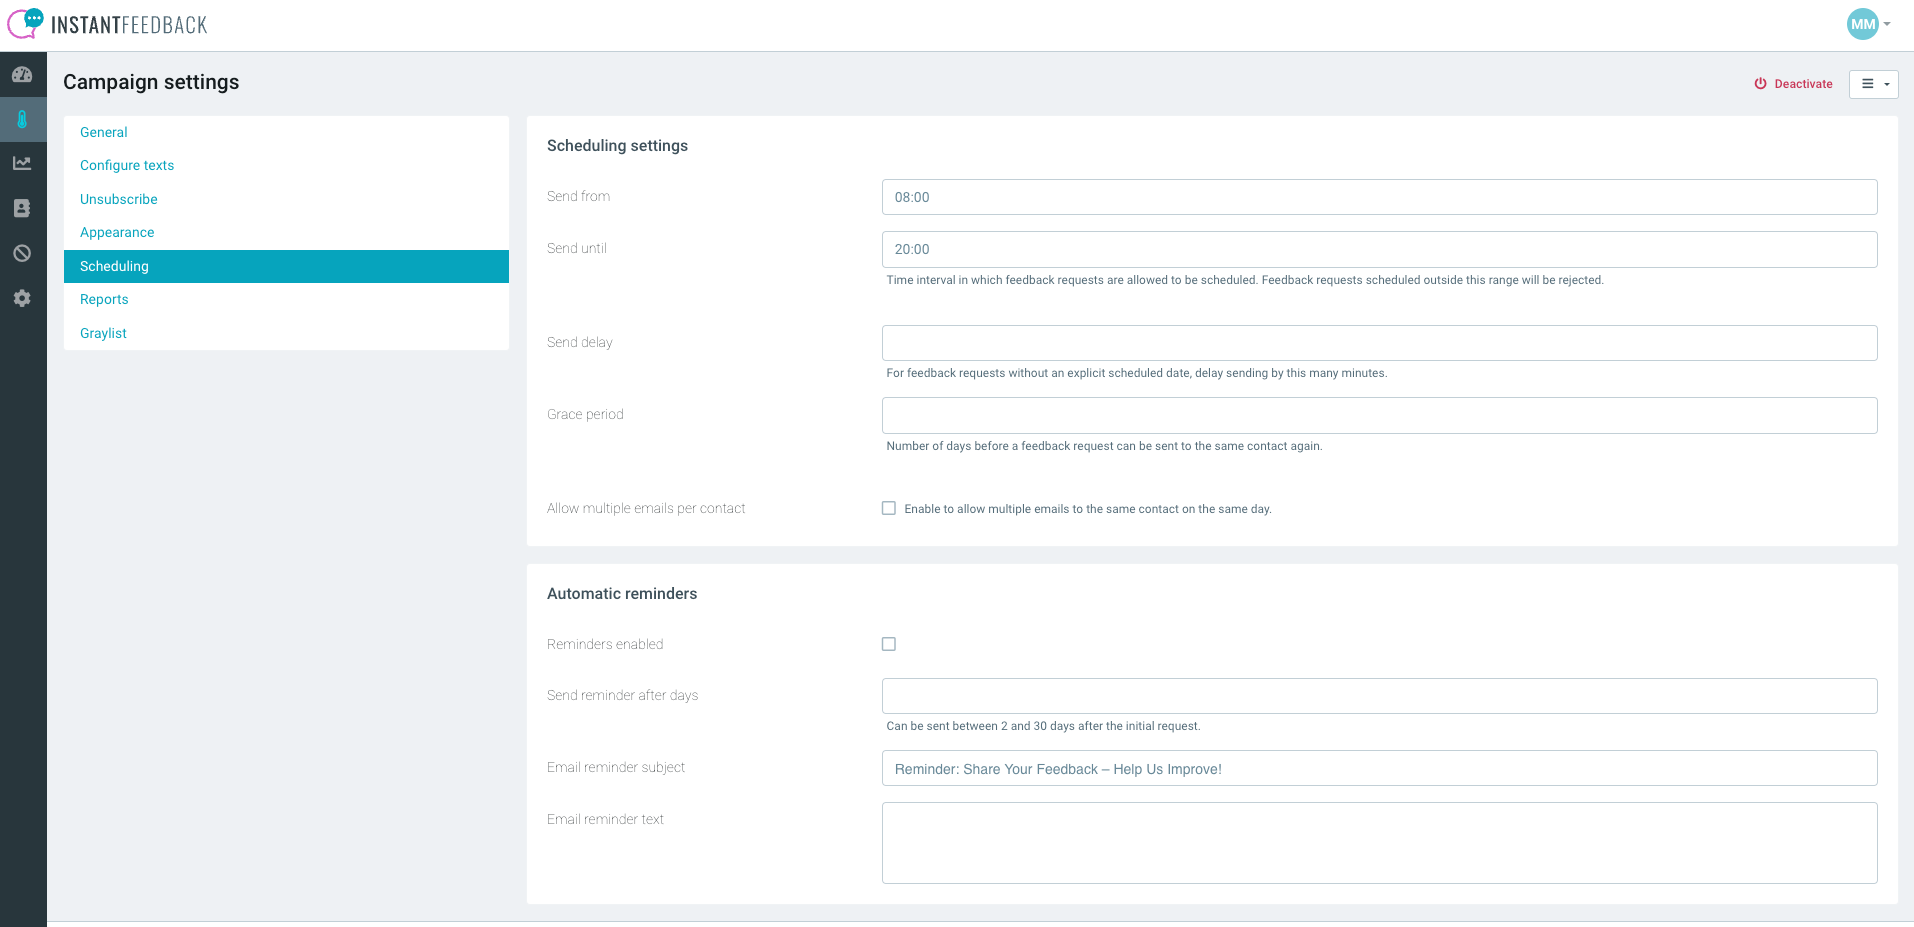
- Scheduling Options:
- Define the timeframe for sending campaigns.
- Set up automatic reminders for unresponsive recipients.
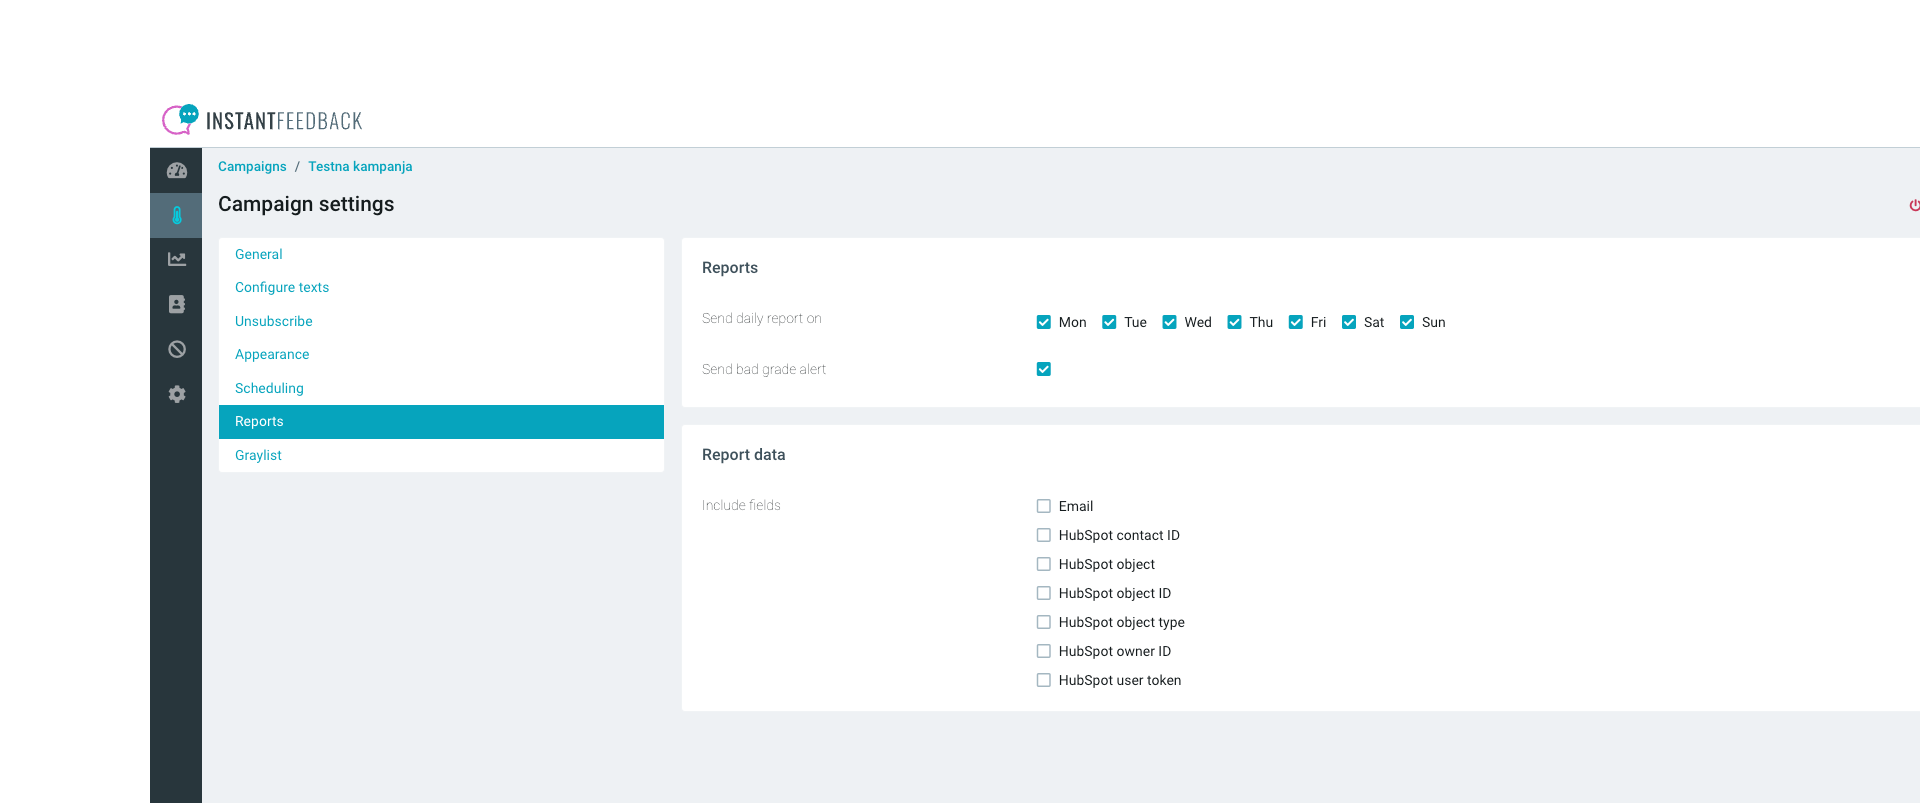
Reports
- Configure when to receive daily reports.
- Set up alerts for low grades (e.g., Detractor responses).
Step 5: Save and Send
After confirming all settings, click Save.
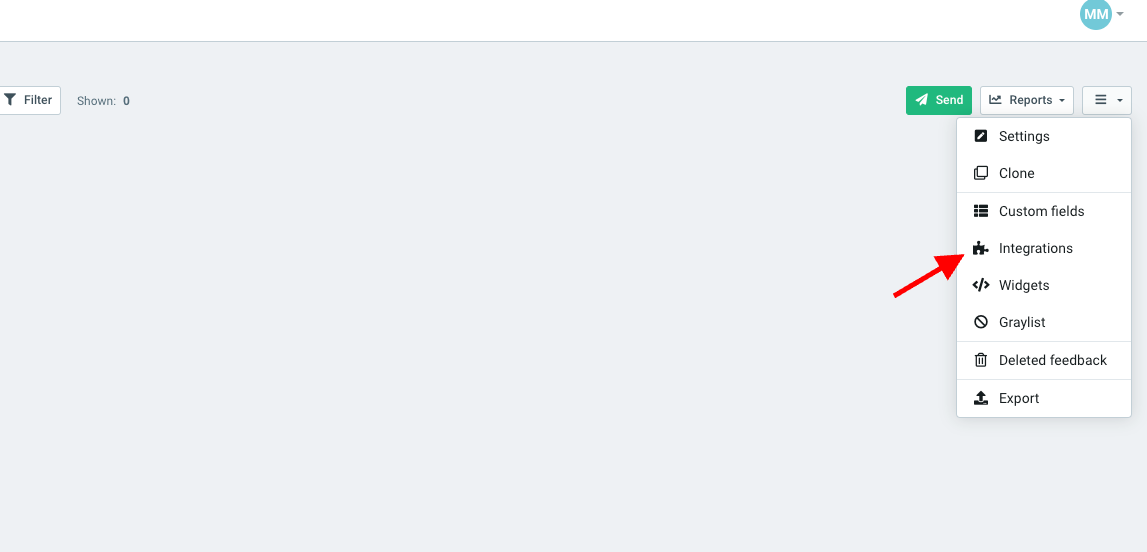
Before clicking Send, you must configure the campaign trigger:
- Navigate to the dropdown menu in the top-right corner.
- Select Integrations from the menu.
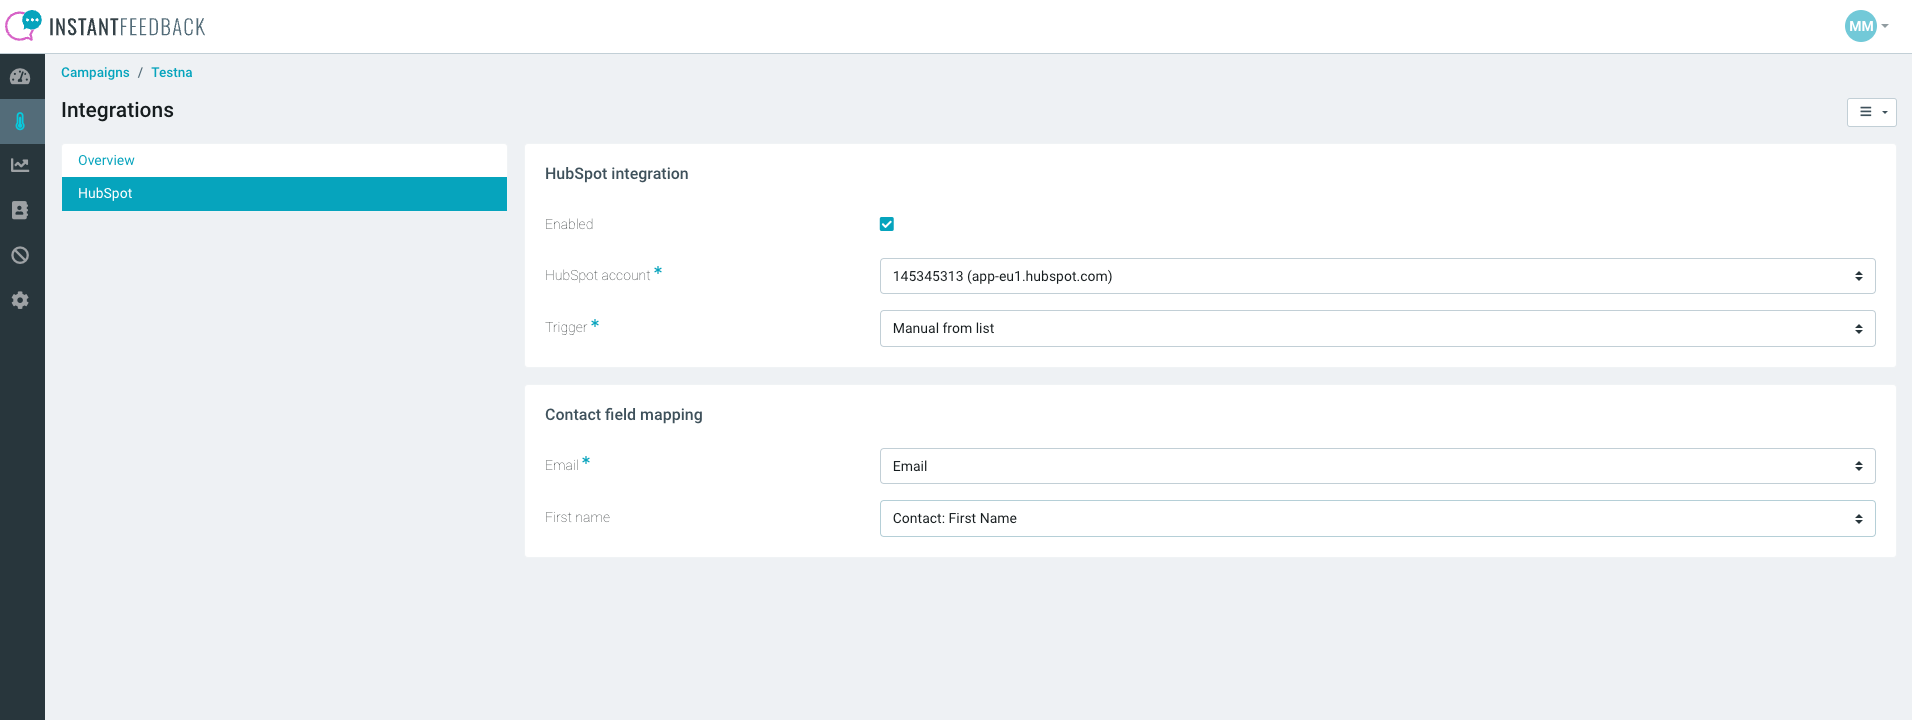
Complete the field mapping as follows:
- Email → HubSpot: Email
- First Name (optional) → HubSpot: First Name
Click Save to apply your changes.
Launch the campaign!
Click the green Send button to proceed.

You will be prompted to enter the HubSpot List ID.
Schedule the send date. If the date is not entered, the campaign will be sent immediately after clicking the import button.

Locate the HubSpot List ID
Open your HubSpot account and navigate to the relevant list.
Click on Details to find the List ID.
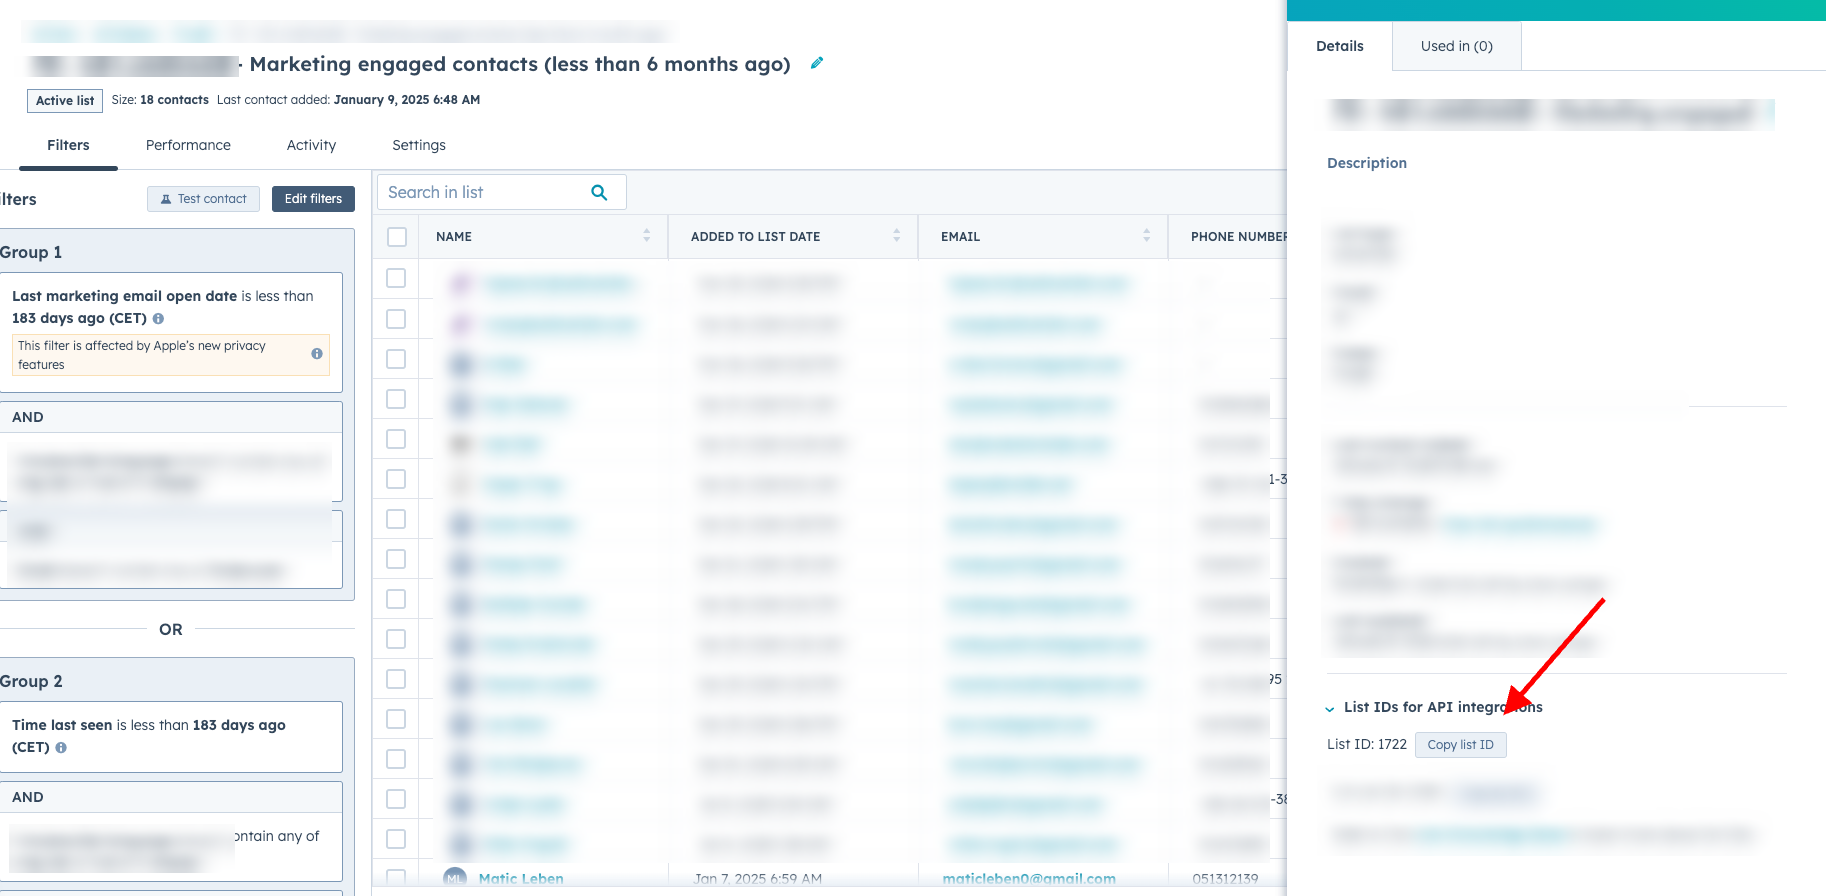
Import the List
- Enter the HubSpot List ID and other required information in InstantFeedback.
- Click Import to finalize the process.
- Note: Freemium users are limited to one HubSpot list import per year.

Finalize and Send
After importing the list, click the green Send button again to officially launch your campaign.